068. Discovering Math in Nature

Discovering Math in Nature
Are you searching for a way to make math more engaging? You’re in the right place! Today, we’re stepping outside the usual curriculum and bringing math to life with nature. Imagine transforming those groans into excitement with hands-on activities that show math in a whole new light. We’re sharing inspiring ideas to help you and your kids rediscover the fun in math, right in your own backyard. Tune in now and get your Free Fibonacci and Golden Ratio lesson plan! Also, be sure to check out our Favorite Math Games organized by concept.
Episode 068:
TWO WAYS TO LISTEN TO THIS EPISODE:
1. Click PLAY Button Above ^^ to listen here.
2. OR Listen on your favorite podcast platform:
Subscribe on Your Favorite Podcast Platform:
Are you just starting your homeschooling journey? We’re here to help! Begin with our Get Started in Homeschooling page and Homeschooling FAQ to make the transition smoother. If you’re guiding a young child, explore our How to Homeschool Kindergarten. to make those first steps special. For middle schoolers, don’t miss our Middle School page packed with tips and advice. And if you’re heading into the high school years, our Essential Steps to Homeschool High School will guide you every step of the way!
Download this week’s FREEBIE
UNIT STUDY: Fibonacci Lesson Plan
Show Notes
Nature and math might seem like an odd pair, but we’ve got plenty of creative ideas to prove otherwise! In Episode 022, “Homeschooling in the Wild,” we explored the benefits of outdoor learning and how to incorporate more nature into your routine and in Episode 067, “Homeschool Homesteading in the Suburbs” we talked about involving your kids and teaching about things like gardening and sustainability. Today, we’re taking it a step further by turning math into an outdoor learning adventure.
Galileo said, “Nature’s great book is written in mathematics.” Galileo was way ahead of his time. His insight highlights the incredible value of using math to understand the world around us. Everywhere we look, mathematical principles follow the laws of nature, from the symmetry of a flower to the rings in a tree trunk. My kids were blown away when they learned about Galileo’s discoveries and shocked at how poorly he was treated for his radical ideas. We’re grateful that times have changed.
Every time we think about math and nature, we always think of the Fibonacci sequence and the Golden Ratio. It truly reflects nature’s elegance and efficiency. Taking math class outdoors can make learning fun and engage your child with so many multisensory experiences. You know we are all about the outdoors and being one with nature- but you don’t have to be particularly outdoorsy to do this. And if you’re not, you may want to consider stepping out of your comfort zone, because there’s so many cool things you could be exploring!
Exploring Mathematical Concepts in Nature
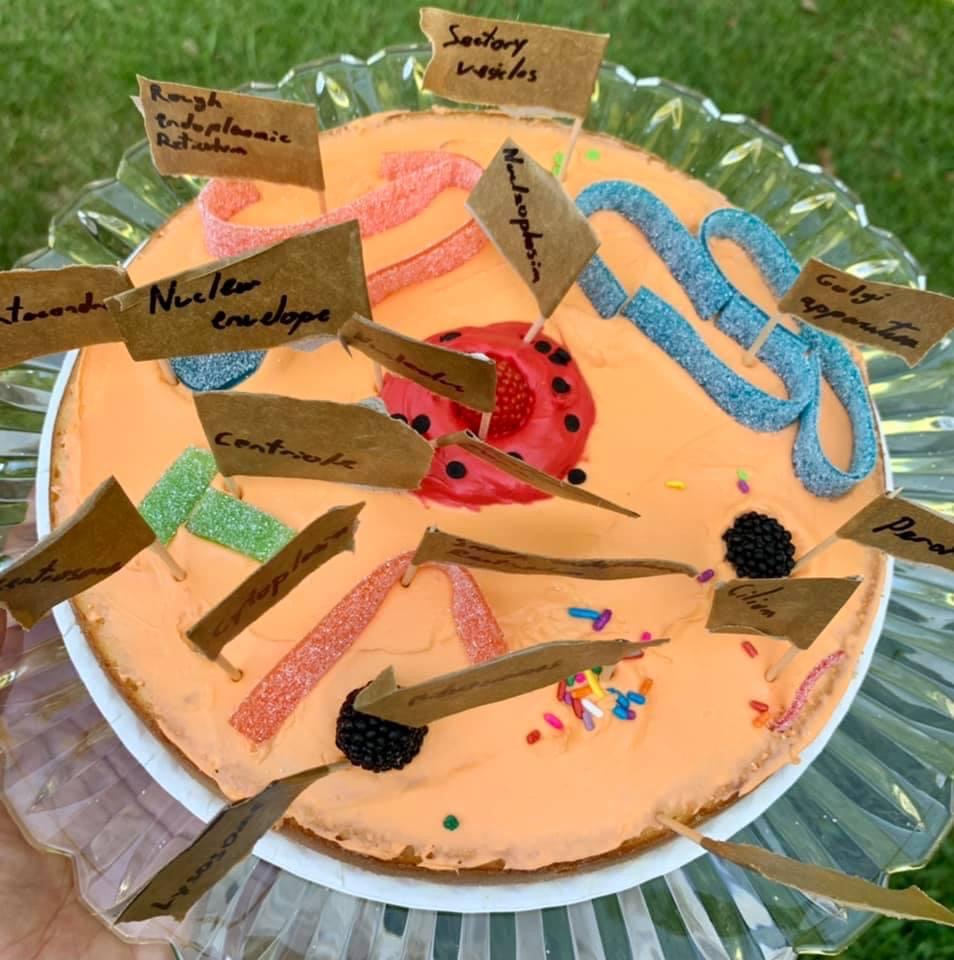
Exploring math outdoors can be both simple and exciting. You don’t necessarily need complex experiments to see the benefits—just being outside and connecting math to nature can make learning more engaging and fun. For younger kids, activities like counting acorns or measuring sticks provide hands-on math that can feel real and relevant to them. At the same time, older kids can explore more advanced concepts, and we’re going to be getting into some of those. The fresh air and new surroundings, along with the practical hands-on approach can help kids see math as part of their world, not just something from a textbook..
Symmetry
Symmetrical shapes are everywhere in biology. Leaves, mammals, starfish, and more contain symmetrical properties.
Activity Ideas:
- Have your child classify living things based on the types of symmetry they observe. For example, contrast the rotational symmetry of a starfish with the bilateral symmetry of an oak leaf.
- Sit down with your child in the backyard or a local park and start exploring together. Point out different leaves and ask them to identify the symmetrical patterns. You can even make it a game by seeing who can find the most symmetrical objects within a certain time.

Shapes
Activity Ideas:
- Identify different shapes in nature. Armadillos make sphere shapes, turtle shells look like circles, and beehives are full of hexagons. Using your imagination, finding geometrical shapes in nature is easy and fun.
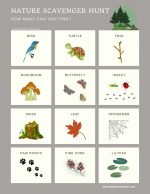
- Scavenger Hunt: Download your Free Nature Scavenger Hunt.
Patterns
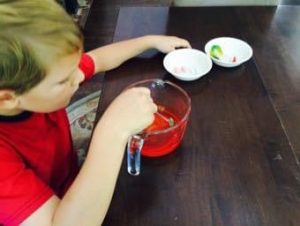
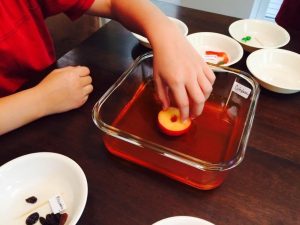
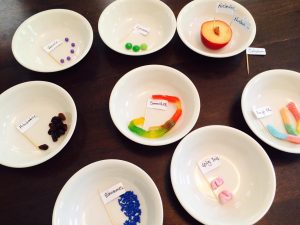
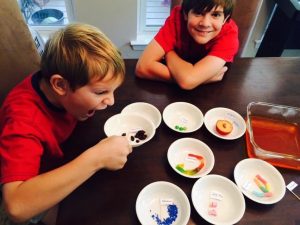
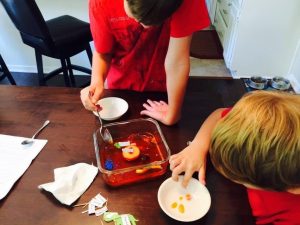
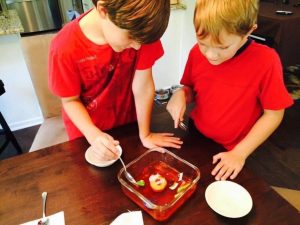
Nature is full of amazing patterns. Like I mentioned earlier, one of the most fascinating is the Fibonacci Sequence. This mathematical pattern shows up in various forms all around us, revealing the beauty and efficiency of nature. You can see this pattern in the way leaves are arranged on a stem, the spirals of a pinecone, or the curves of a seashell. It’s named after an Italian mathematician. I’ve created a free lesson pack with tons of hands-on activities to help you explore this phenomenon (Scroll down to download). Even the youngest homeschoolers will be in awe as they discover this all around them. I spent so much time creating this to make it available to really all ages. And if you don’t completely understand the sequence, my lesson pack will teach you about it! Outside of the Fibonacci sequence, there really are so many patterns that you can find in nature.
Activity Ideas
- Fibanacci Sequence and The Golden Ratio: Explore math’s beauty with the FREE Fibonacci Sequence Unit Study. Hands-on activities that connect math to nature, art, music, and poetry!
- Take a nature walk with your child and bring a notebook to draw or list the different shapes and patterns you find. This Nature Journal is perfect for Young Explorers.
- Discuss how these shapes are similar to those in their geometry lessons. Count the petals on a flower or the seeds in a fruit.
- Talk about how these patterns match the Fibonacci or don’t match the sequence. You could even take pictures and create a nature shape collage when you get home.

Counting
Counting activities engage young learners and help them develop number sense.
Activity Ideas
- Ask your kids to collect five pine cones, ten sticks, or any small quantity of common objects. Then, count the items together. A pine cone, for example, can be further analyzed by counting the number of scales it contains.
- Go on nature walks and collect items and count them together. This activity can be extended by sorting and categorizing the items collected. You can even work on your multiplication tables by sorting them into number groups.
- Go on a scavenger hunt with your child and collect different natural items. Once you’re back home, lay everything out and count the items together. You can sort them by type, size, or color, and even use them for math problems.

Measurement
Measuring activities help students gain a sense of proportion about the world. Give your child tools like rulers, tape measures, and a notebook to measure and record their findings. Spend an afternoon measuring different objects in your yard or at a park. Compare the lengths of sticks, rocks, or leaves and discuss the differences. For older children, you can introduce concepts like mean, median, and mode by calculating the average lengths.
Activity Ideas
- Ask your kids, “How long is the average stick in your backyard?” Collect a bunch of sticks, measure their lengths, and compute the averages. Then, compare the sizes of the sticks to other items.
- High school students can use their knowledge of statistics to determine if such measurements are normally distributed.

Estimating
Estimating activities build on measuring activities. You can use estimation activities to teach your kids how to make educated guesses based on partial data.
Activity Ideas
- Ask, “How many beetles are in the garden?” or “How many pine cones are in the forest?”
- Have students count how many of each item they find in one area and extrapolate the answers using multiplication.
- One Small Square is our favorite book series to engage this kind of activity. Let them know that while there isn’t a single correct answer, they can get close by applying estimation principles.Start with something simple, like estimating the number of leaves on a small tree branch. Count the leaves on one part of the branch and multiply to estimate the total. Discuss how close their estimates are to the actual numbers.
Weather and Meteorology
Weather is a rich source of math in nature. Show your students how to use a thermometer to measure temperature and a hygrometer to measure humidity.
Activity Ideas
- Measurements: Ask them to take regular measurements over time. Teach them how to measure rainfall and use math to make weather predictions. We loved the Williamson Weather activity book for this. And meanwhile, For high school students, introduce the formula for converting Fahrenheit to Celsius and vice versa.
- Weather Monitoring: Set up a simple weather station in your backyard and have your students record their observations daily. The Kids’ Book of Weather Forecasting has tons of projects that were illustrated and explained really well. It was a perfect companion gift for the child’s weather station.
- Journal: Create a weather journal together. Each day, have your child record the temperature, humidity, and any other weather-related observations. Over time, look for patterns and make predictions about future weather based on their data. You can start this really young- there are cute check off boards or worksheets for this, or you can make your own. On our Facebook freebie group, I posted a free hurricane chart that we’ve used every hurricane season. I always like to have the kids predict the trajectory of a hurricane and then compare it to what it actually did.


Trigonometry
Trigonometry is a branch of mathematics that studies relationships between the sides and angles of triangles. Students can use trigonometry to calculate tree heights. Measure the lengths of their shadows and the tree’s shadow. By calculating the ratio of their heights to their shadows, students can determine the tree’s height since the ratio will be the same.
Activity Ideas
- Tree Height Calculation: Provide your students with a measuring tape and a calculator to practice trigonometry outdoors. Go outside on a sunny day and measure the length of your shadow and the shadow of a tree. Use a simple trigonometry formula to calculate the height of the tree. This hands-on activity makes abstract math concepts more tangible and fun. This one totally fascinated my kids! Detailed instructions on determining a tree height using trigonometry.
- Space: Astronomers use trigonometry to calculate how far stars and planets are from Earth. You can learn more about how NASA uses trigonometry here. The book Hidden Figures was made popular by the women mathematicians at NASA. See Katherine Johnson’s actual Trigonometry Math Calculations!
- Kites: An excellent way for students to gain a feel for aerodynamic forces is to fly a kite. Students can also use math techniques learned in high school to determine the altitude of the kite during the flight.

Fractals in Nature
Fractals are a simple pattern that repeats over and over again at smaller scales and go on infinitely. Fractals help us study and understand important scientific concepts, such as the way bacteria grow, patterns in freezing water (snowflakes) and brain waves. The Fibonacci sequence is a type of fractal and hunting for fractals in nature is fun. These fascinating shapes are found everywhere, from mountain ranges to tree branches. While fractal geometry is advanced, the idea of self-similarity is accessible even to young children.
Activity Ideas
- Fractal Exploration: Use nature walks to identify fractals. Discuss the concept of self-similarity and how it applies to the natural world. Explore a local park or forest looking for fractals in leaves, tree bark, or even clouds.
- Take photos or draw the fractals you find. Later, you can discuss how these patterns repeat at different scales and why they are important in nature.

Space and Astronomy
Remind kids that outer space is part of the natural world, too. Students can track the moon’s movements and phases to understand periodic motion.
Activity Ideas
- Night Sky Observation: Encourage your students to keep a moon journal, recording its phases and positions over time. My favorite way to do this is with Oreos. Spend a few nights observing the moon. Have your child draw the moon’s shape and note its position in the sky. Over a month, they’ll see how the moon changes and learn about its phases and orbit.
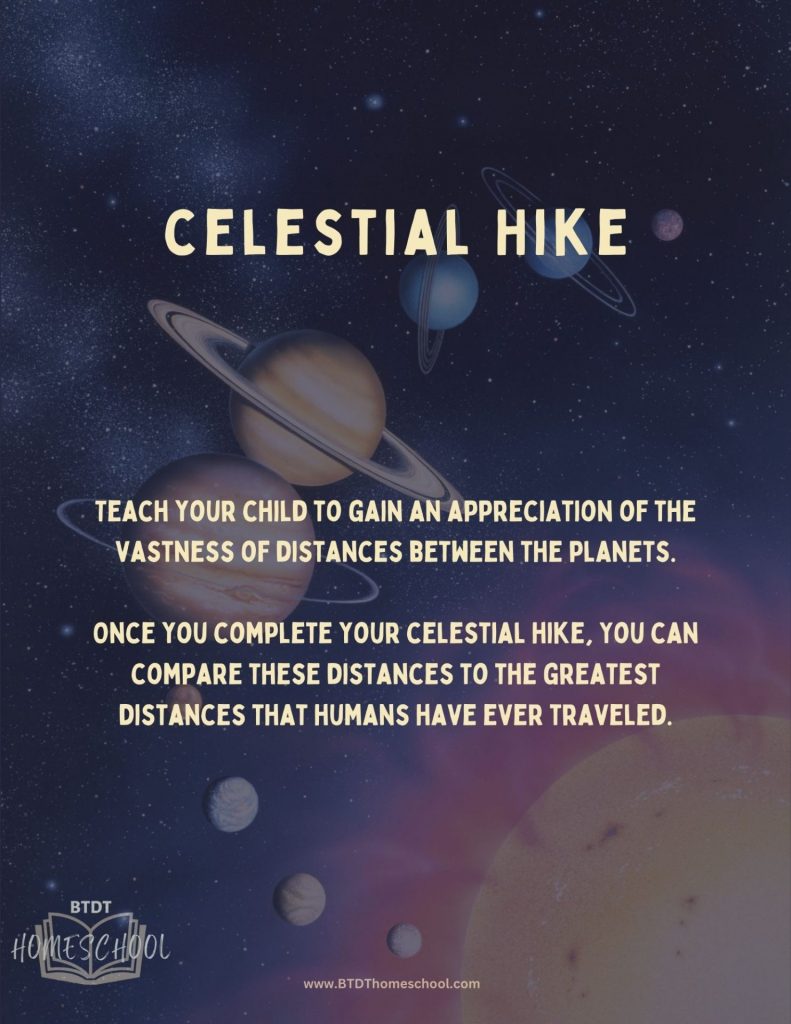
- Celestial Hike: Learn about distances in our solar system by taking an interplanetary hike! Get your FREE celestial printable!
Playing Math Games in Nature
There are so many math activities and games that can help your child associate math with fun instead of a laborious chore. Many indoor math games work just as well outside, too. There’s just something that truly brings kids alive by moving it outdoors. The Moon Book.
Activity Ideas
- Math Twister: Similar to regular Twister, but with numbers drawn on the ground. Give students math problems to solve and have them touch the correct number. Draw a large grid on your driveway or use chalk to create a number mat. Call out math problems and have your child place their hands and feet on the correct answers. This combines physical activity with mental math practice.
- Navigation Games: Hide a ball and give students directions to find it. This helps them practice geometry and spatial awareness.
Create a treasure hunt in your backyard or a local park. Write clues that require your child to use directions and distances to find the next clue. This reinforces geometry concepts while they have fun searching for the treasure. You can introduce cardinal directions and a compass rose with our Free Geography Bundle lesson pack. - Sports Math: It’s a Numbers Game! Soccer: The Math Behind the Perfect Goal, the Game-Winning Save, and So Much More! It’s a Numbers Game! Basketball: The math behind the perfect bounce pass, the buzzer-beating bank shot
Safety in Nature
Taking the math classroom outdoors can come with challenges. Depending on where you live, nature varies by location, so adapt activities to your surroundings. Be mindful of outdoor dangers like wild animals and poisonous plants. Ensure your nature math activities take place in a safe area.
Activity Ideas
- Safety First: Teach your kids about local wildlife and plants. Be sure to choose safe locations for your outdoor activities. The Practical Survival Guide for Kids: A Basic How to Survive and be Prepared in the Wilderness.
Before heading out, discuss any potential hazards and how to avoid them. Teach your child to recognize plants like poison ivy and animals that could pose a threat. Stick to well-known paths and areas that you know are safe. Learn about venomous or dangerous animals in your area.
Conclusion
Spending all day indoors is not ideal for our physical or mental health. Moving the classroom outdoors offers a refreshing change, especially for subjects like math. Taking math outside shows its relevance beyond textbooks, making it more engaging. Kids that engage in outdoor math activities are more likely to enjoy and understand math.
If you’re new to homeschooling or struggling with teaching math, remember that you’re not alone. Many homeschoolers face the same challenges, but the beauty of homeschooling is the flexibility it offers. Take a deep breath, embrace the journey, and know that it’s okay to try different approaches until you find what works best for your family. Don’t be afraid to get creative and make learning fun. Math doesn’t have to be confined to textbooks and drills. By integrating math into everyday activities and taking lessons outdoors, you can help your child see the beauty and practicality of math in the world around them.
Incorporating nature into your math curriculum can make learning more enjoyable and meaningful. From symmetry and shapes to estimation and trigonometry, nature offers endless opportunities to explore mathematical concepts.
This Week’s Free Resource