Making a Jello Cell
Scroll down for your FREE Science Bundle to learn all about Cells
Years ago, kicked off our “Not Back to School” week with a fun and memorable project: the Jello Cell Activity! My kids are teenagers now, but they still remember how much they enjoyed it.
Cells are the building blocks of life. Every living organism, from plants to animals, is made up of trillions of cells, each containing organelles that perform essential functions, enabling the organism to thrive. With this activity, you and your children can create an edible cell model to explore the structure of cells in a fun, hands-on way! For more creative ideas and to download free first day questionnaires and photo signs, be sure to visit our First Day of School page!
For a wealth of tips, creative activities, and hands-on experiments that bring science to life, explore our Hands-onScience Page. Discover how to make learning science an engaging and enjoyable experience for your children!
Materials Needed*
- Small strips of paper
- Tape
- Toothpicks
- Jell-O mix
- Water
- Glass square container
- Pineapple Ring
- Maraschino Cherry
- Fruit roll-ups
- Sugar-coated gummy worms
- Smooth gummy worms
- Gumdrops
- Sixlets
- Raisins
- Gobstoppers
- Sprinkles
*Use any variation of candy to represent if you can’t locate an ingredient. Get creative!
BTDT Homeschool was created with a heartfelt mission: to empower and give back to the secular homeschool community.
Are you just starting your homeschooling journey?
We’re here to help! Through our informative podcasts, blog posts, daily inspiration, and a wide range of free printable tools, we aim to empower you. Begin with our 10 Steps to Getting Started in Homeschooling page and Homeschooling FAQ to make the transition smoother. If you’re guiding a young child, explore our How to Homeschool Kindergarten page to make those first steps special. For middle schoolers, don’t miss our Middle School page packed with tips and advice. And if you’re heading into the high school years, our Essential Steps to Homeschoo High School will guide you every step of the way!
Subscribe on Your Favorite Podcast Platform:
Instructions:
Enjoy your delicious and educational Jell-O cell model!
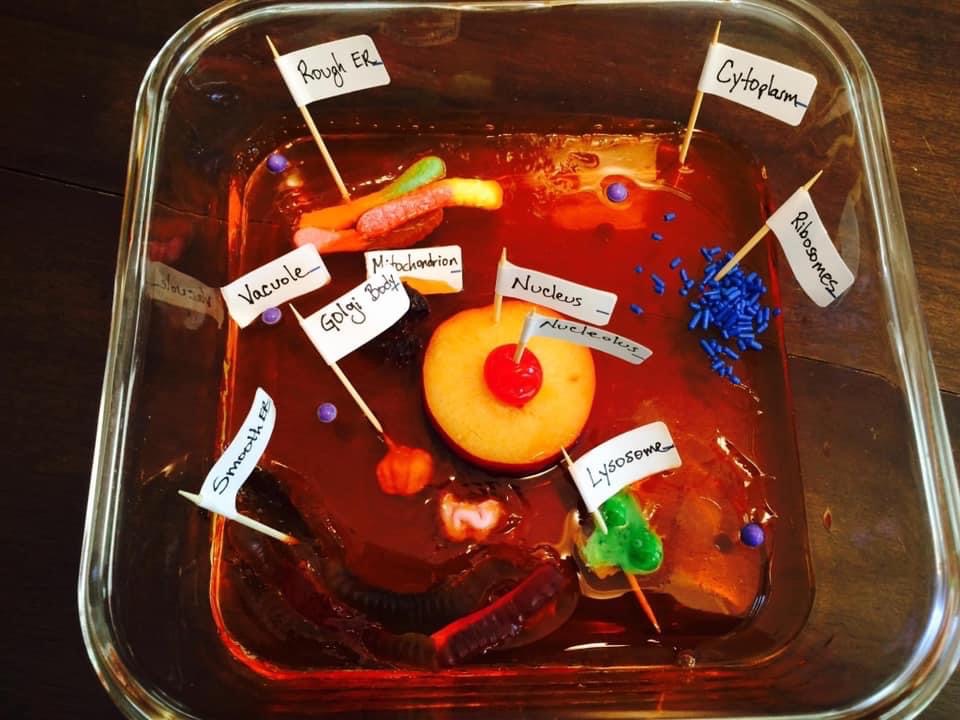
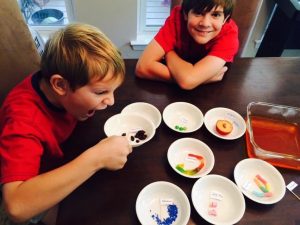
- Labeling the Organelles
- Write the name of each organelle on a small strip of paper.
- Tape each strip to a toothpick.
- Insert the toothpick into the gelatin next to the corresponding organelle to label the components of your cell model.
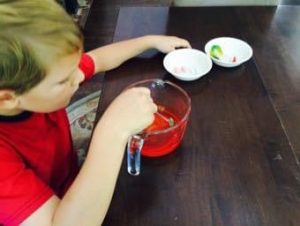
- Preparing the Jell-O
- Make the Jell-O according to package instructions, but use about ¾ of the recommended water.
- This ensures your “cytoplasm” will be sturdy enough to hold all of the “organelles” without shifting or sinking to the bottom of the cell.
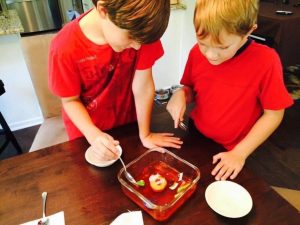
- Creating the Cell Model
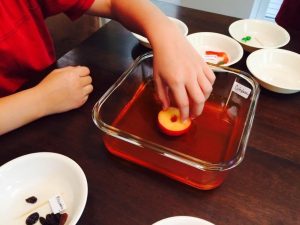
- Pour the Jell-O into a container (a glass square container works well).
- The container will act as the cell wall or membrane.
- For a plant cell, you may want to use lime Jell-O.
- Setting the Jell-O
- Place the Jell-O in the refrigerator for about 45 minutes, until it is almost set but not quite.
- While waiting, prepare the other supplies.
- Cut the nectarine in half, ensuring the pit stays in one half.
- Cut the fruit roll-ups into ¼ inch strips.
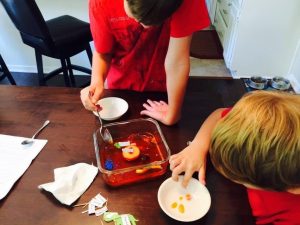
- Adding the Organelles
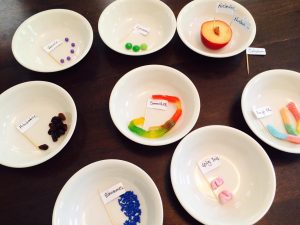
- Nucleus: Slip the pineapple ring with cherry into the center of the Jell-O representing the nucleus
- Rough and Smooth ER (endoplasmic reticulum): Place some sugar-coated and smooth gummy worms around one side of the nucleus to represent rough and smooth ER.
- Centrosomes: Push a few gumdrops around the nucleus
- Lysosomes: Scatter sixlets through the Jell-O for lysosomes.
- Mitochondria: Use raisins to represent the mitochondria.
- Vacuoles: Use Gobstoppers to symbolize vacuoles.
- Ribosomes: Sprinkle the Jell-O with sprinkles to represent ribosomes.
- Golgi bodies: Fold your fruit roll-ups into accordions and insert them as Golgi bodies.
- Finalizing the Cell Model
- Allow the Jell-O to set for about 20 more minutes, or until fully set.
This hands-on project will not only provide a fun and engaging activity in your homeschool, but it also teaches your children to visualize and understand the structure of cells in a creative way.
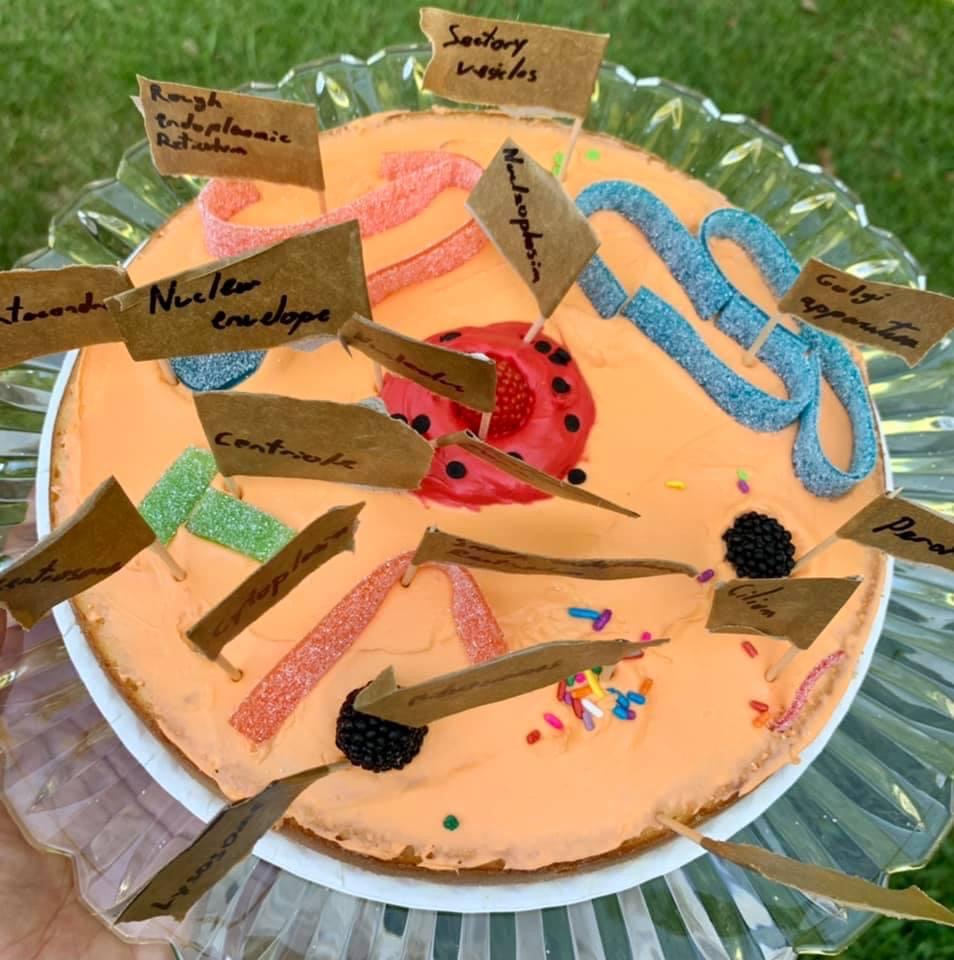
Years later, when my son was in Homeschool High School Biology, he created a “Cell Cake” without my help. He had a lot of fun with this one too!